The LiftMaster Keypad Manual PDF is a comprehensive guide for installing and operating LiftMaster wireless keypads. It covers essential setup, programming, and troubleshooting steps for smooth operation.
1.1 Overview of the LiftMaster Keypad System
The LiftMaster Keypad System offers a convenient, wireless solution for controlling garage door openers. Designed for ease of use, it features a backlit keypad, secure PIN entry, and compatibility with various LiftMaster models. This system enhances home security and provides reliable access with minimal installation effort.
1.2 Importance of the Manual for Proper Installation and Use
The manual is crucial for correct installation and operation of the LiftMaster Keypad. It provides step-by-step instructions, safety precautions, and troubleshooting tips, ensuring users can set up and maintain their system effectively. Adhering to the guide helps prevent errors and guarantees optimal functionality and security of the garage door opener.
Key Features of the LiftMaster Wireless Keypad
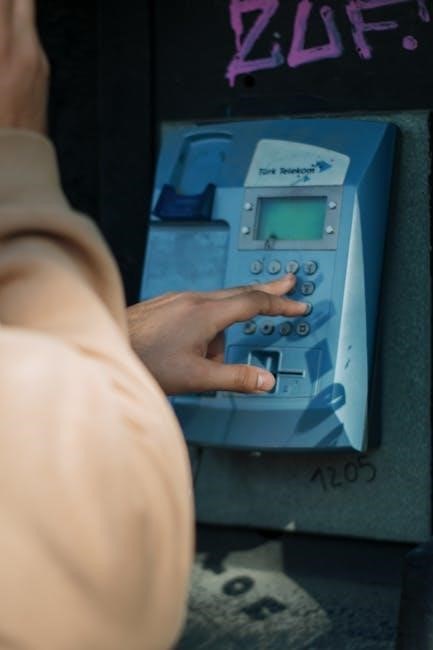
The LiftMaster Wireless Keypad features a backlit design for enhanced visibility, compatibility with various LiftMaster garage door openers, and advanced security options like PIN programming for safe access.
2.1 Backlit Keypad for Enhanced Visibility
The LiftMaster Wireless Keypad includes a backlit design, ensuring enhanced visibility in low-light conditions. This feature allows users to enter their PIN comfortably, even at night or in dimly lit areas, improving overall convenience and accessibility without compromising security.
2.2 Compatibility with LiftMaster Garage Door Openers
The LiftMaster Wireless Keypad is designed to work seamlessly with various LiftMaster garage door openers, including models operating on 315 MHz and 390 MHz frequencies. Compatibility ensures reliable performance and easy integration with existing systems, provided the opener has a functional learn button for proper syncing.
2.3 Security Features and PIN Programming
The LiftMaster Wireless Keypad offers enhanced security with programmable PINs, ensuring only authorized access. A 4-digit PIN provides reliable protection, while the keypad’s backlit design allows easy entry in low-light conditions. The system supports multiple PINs for different users and can be synchronized with your garage door opener for secure operation.
Installation Guidelines
Mount the keypad within sight of the garage door, install the battery first, and ensure it’s out of children’s reach. Maintain 4-10 cm clearance for proper operation.
3.1 Mounting the Keypad Within Sight of the Garage Door
Mount the keypad within clear sight of the garage door for easy access and visibility. Ensure it’s installed at a minimum height of 1.5 meters, out of children’s reach, and at least 4-10 cm away from the door’s path to avoid damage. Proper placement ensures functionality and safety.
3.2 Battery Installation and Requirements
Install a 9V Lithium battery in the keypad, ensuring proper alignment with terminals. Battery life typically lasts up to 5 years. Replace when the keypad blinks or responds slowly. Always use a high-quality battery to maintain reliable performance and security of your LiftMaster system.
3.3 Recommended Mounting Height and Clearance
Mount the keypad at a minimum height of 1.5 meters to ensure it is out of children’s reach but within clear sight of the garage door. Maintain 4–10 cm clearance from the door to prevent damage. Proper placement ensures optimal functionality and safety while operating your LiftMaster system effectively.

Programming the LiftMaster Keypad
Programming involves entering a PIN, syncing the keypad with the opener, and following step-by-step instructions. The keypad will blink during programming, confirming successful synchronization with your garage door opener system.
4.1 Step-by-Step Instructions for PIN Setup
- Enter a 4-digit PIN using the keypad.
- Press the ENTER button to confirm the PIN.
- The keypad will blink, indicating successful synchronization.
- Test the PIN to ensure proper functionality.
Follow these steps to securely program your LiftMaster keypad with a personalized PIN for easy access to your garage door opener system.
4.2 Programming the Keypad to Multiple Garage Door Openers
- Enter a unique 4-digit PIN for each garage door opener.
- Press the ENTER button to confirm the PIN for each opener.
- Repeat the process for all desired openers.
- The keypad will blink to indicate successful synchronization.
- Test each PIN to ensure proper functionality across all openers.
Program multiple openers by assigning unique PINs, ensuring each opener is synced individually for seamless operation.
4.3 Entering Programming Mode and Syncing with the Opener
To enter programming mode, press and hold the ENTER button until the keypad blinks. Release and press the 0 key to clear any existing codes. Press the learn button on your opener, then enter your desired PIN on the keypad. The keypad will blink to confirm successful syncing with the opener.
Troubleshooting Common Issues
This section addresses common problems with the LiftMaster keypad, such as unresponsiveness or syncing issues, providing clear solutions to ensure proper functionality and user convenience.
5.1 Keypad Not Responding or Blinking
If the keypad is unresponsive or blinking, check the battery life and ensure proper installation. Verify signal strength and obstructions. Resetting the keypad or re-syncing with the opener may resolve the issue; Consult the manual for detailed troubleshooting steps to restore functionality.
5.2 Issues with PIN Recognition or Entry
If the keypad fails to recognize the PIN, ensure the code is entered correctly and free from obstruction. Check for dirt or debris on the keypad. Verify the PIN is programmed correctly in the opener’s settings. If issues persist, resetting the keypad or reprogramming the PIN may be necessary.
5.3 Resetting the Keypad to Factory Settings
To reset the LiftMaster keypad, press and hold the learn button on the garage door opener while simultaneously pressing the enter button on the keypad. This clears all programmed PINs and settings, requiring a new setup. Refer to the manual for detailed instructions to reprogram the keypad after resetting.
Safety Precautions and Warnings
Always follow safety guidelines when installing or using the keypad. Install out of children’s reach and avoid placement in the garage door’s path. Ensure emergency features are understood.
6.1 Installing the Keypad Out of Reach of Children
Mount the keypad at a minimum height of 1.5 meters to prevent children from accessing it. Ensure it’s within sight of the garage door but not in the door’s path. This prevents accidents and unauthorized use, enhancing safety and security for your family.
6.2 Avoiding Placement in the Path of the Garage Door
Install the keypad away from the garage door’s movement path to prevent damage. Ensure at least 4-10 cm clearance from obstacles. This avoids interference and ensures safe, reliable operation of both the keypad and garage door system.
6.3 Understanding Emergency Safety Features
The LiftMaster keypad includes emergency safety features like obstacle detection and automatic reversal. These features ensure the garage door stops or reverses if an obstacle is detected, enhancing safety and preventing accidents. Proper installation and regular testing are crucial to maintain these safety functions effectively.
Maintenance and Care
Regular cleaning of the keypad surface ensures proper function. Replace batteries as needed to maintain performance. Check for firmware updates to keep the system optimized.
7.1 Cleaning the Keypad Surface
Regularly clean the keypad with a soft, dry cloth to remove dirt and grime. For stubborn marks, use a mild detergent and water, avoiding harsh chemicals or abrasive materials. Ensure the keypad is dry to maintain functionality and prevent damage. This helps preserve the backlit display and ensure reliable operation.
7.2 Replacing the Battery
Replace the 9V Lithium battery when the keypad’s low-battery indicator flashes. Open the battery compartment, remove the old battery, and insert the new one following the polarity markings. Ensure the keypad is programmed before installation. Proper battery replacement maintains reliable operation and prevents data loss or connectivity issues.
7.3 Updating Firmware (If Applicable)
Check the LiftMaster website or support for firmware updates. Download and install the latest version using a computer or smartphone. Ensure compatibility with your keypad model. Updating firmware enhances security, fixes issues, and adds features, ensuring optimal performance and compatibility with your garage door opener system.
Compatibility with LiftMaster Garage Door Openers
The LiftMaster wireless keypad is compatible with select garage door opener models, ensuring seamless operation. It works with openers featuring a learn button and specific frequencies for optimal functionality.
8.1 Models Compatible with the Wireless Keypad
The LiftMaster wireless keypad is compatible with specific garage door opener models, including Chamberlain 315 MHz and 390 MHz openers. Models like 940EV, 940EVC, and KPW250 are supported. Ensure the opener has a learn button for proper syncing. Compatibility varies by frequency and manufacturing date, with 2022+ models optimized for wireless integration.
8.2 Frequency Requirements for Proper Functionality
The LiftMaster wireless keypad operates on 315 MHz and 390 MHz frequencies, ensuring compatibility with most LiftMaster garage door openers. Ensure the opener uses the same frequency for proper syncing. Newer models may have enhanced frequency support, so verify specifications before installation for optimal performance and compatibility.
8.3 Ensuring the Opener Has a Learn Button
The garage door opener must have a Learn Button for proper keypad functionality. This button, often yellow, green, or white, is typically located near the antenna or on the rear panel. Ensure the opener model supports this feature, as it’s essential for syncing the keypad to the system. Refer to the opener’s manual if the button’s location is unclear.

Advanced Features and Customization
The LiftMaster Keypad supports advanced features like controlling multiple garage doors, setting temporary PINs, and integrating with smart home systems for enhanced convenience and security.
9.1 Using the Keypad for Multiple Doors
The LiftMaster Keypad can control multiple garage doors by programming unique PINs for each door. This feature enhances convenience for homes or commercial spaces with several garage doors, ensuring seamless operation and personalized access control. The system supports secure and efficient management of various entry points simultaneously.
9.2 Setting Up Temporary or Guest Access PINs
Temporary or guest PINs can be easily programmed for limited access. Users can set time-specific or one-time use codes, ensuring security without compromising convenience. This feature is ideal for granting access to visitors or service providers without sharing the primary PIN, enhancing home or facility security.
9.3 Integrating with Smart Home Systems
The LiftMaster keypad can integrate with smart home systems, enabling voice control and seamless operation through platforms like MyQ. Users can control multiple garage doors and receive notifications, enhancing convenience and security. This integration allows for a unified smart home experience, making it easier to manage access and monitor activity remotely.
Warranty and Support Information
The LiftMaster keypad manual outlines warranty details and provides customer support contact information. Users can easily access additional resources like FAQs and downloadable guides online.
10.1 Understanding the Warranty Coverage
The LiftMaster keypad manual details warranty coverage, typically offering a 1-year limited warranty for manufacturing defects. Warranty claims require proof of purchase and may exclude damages from improper installation or misuse. Terms vary by product and region, ensuring customers understand their coverage and rights for repairs or replacements.
10.2 Contacting LiftMaster Customer Support
For assistance, contact LiftMaster customer support via phone at 1-800-528-5637 or visit their official website at www.liftmaster.com. They offer dedicated support for troubleshooting, repairs, and general inquiries. Online resources, including FAQs and manuals, are also available to help resolve common issues efficiently.
10.3 Accessing Additional Resources Online
Visit LiftMaster’s official website for additional resources, including downloadable PDF manuals, FAQs, and troubleshooting guides. The site offers detailed product information and user guides for models like the KPW250. Access support articles, video tutorials, and software updates to ensure optimal performance of your LiftMaster keypad.
The LiftMaster Keypad Manual PDF is a valuable resource for understanding and optimizing your keypad’s functionality. It ensures secure, convenient access while guiding you through installation, programming, and troubleshooting for an optimal user experience.
11.1 Summary of Key Points
The LiftMaster Keypad Manual PDF provides detailed guidance on installation, programming, and troubleshooting. It emphasizes proper setup, security features, and PIN customization, ensuring safe and convenient garage door access. Regular maintenance and compatibility checks are also highlighted for optimal functionality and longevity of the keypad system.
11.2 Final Tips for Optimal Use of the LiftMaster Keypad
Mount the keypad within sight of the garage door, out of reach of children. Regularly clean the surface and replace batteries as needed. Program temporary PINs for guests and ensure firmware updates are applied. Always test functionality after programming or maintenance to ensure smooth operation and security.

References and Additional Resources
Download the official LiftMaster Keypad Manual PDF from their website for detailed instructions. Additional resources include product guides, troubleshooting tips, and FAQs available on the LiftMaster support page.
12.1 Downloading the Official LiftMaster Manual PDF
Visit the LiftMaster official website and navigate to the support section. Search for your specific keypad model to download the PDF manual. Follow on-screen instructions to access installation, programming, and troubleshooting guides. Ensure you have the correct model number for accurate results. This resource is essential for optimal keypad functionality and maintenance.
12.2 Recommended Tools and Accessories
For optimal installation and use of the LiftMaster keypad, ensure you have a 9V lithium battery, mounting hardware, and a level. Additional tools like a screwdriver and programming guide may be required. Refer to the PDF manual for a complete list of recommended tools and accessories for seamless setup and maintenance.
12.3 Links to LiftMaster Support and FAQ Pages
Visit LiftMaster’s official website for direct links to support pages, FAQs, and downloadable resources. Access the PDF manual and troubleshooting guides at www.liftmaster.com/resources. For additional assistance, explore their FAQ section at www.liftmaster.com/support to address common questions and resolve issues efficiently.